QuaDror
There has recently been a bit of media buzz surrounding the announcement by Dror Benshetrit of a new structural component that he has named the QuaDror. Here’s a video of the QuaDror in action:
I couldn’t leave well enough alone, and decided that I had to build one of my own. So I studied the video and worked up a SketchUp model, and figured out the basic principles. In the process, I learned a number of interesting things, and discovered that the QuaDror has a couple of unexpectedly close cousins. What follows below is a step-by-step process that you can follow to make your own QuaDror. Be advised, however, that the QuaDror is patent pending (at least in the USA), so while you can build one for your own investigation, you can’t sell (or even give away) anything containing a QuaDror joint without obtaining a license from Studio Dror.
The first thing I learned while playing around is that there really are no critical dimensions in the QuaDror; the only things to worry about are some simple relationships between dimensions. (For the mathematically-inclined reader, I believe that the QuaDror retains its behavior under any affine transformation, although I haven’t proven it.)
Because the dimensions are flexible, the description that follows focuses primarily on design principles, rather than specific measurements.
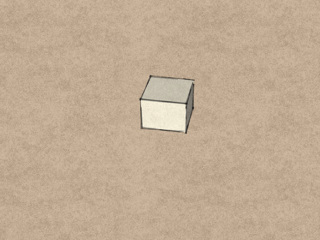
We begin with a square block, of some thickness. The thickness can be different from the length of the sides of the square; that is, it doesn’t have to be a perfect cube. (Strictly speaking, the top and bottom faces don’t even have to be square, but non-square faces introduce some complications that I’d rather not get into just yet.) This square block is our basic module.
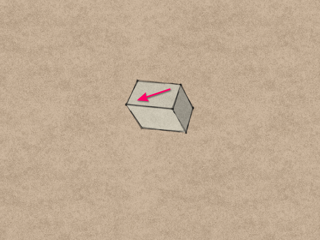
Now we translate the top face of the block along a face diagonal. This is known as a shear transformation. Once again, the amount of translation is whatever you want it to be, although it will have a bearing on how far apart the QuaDror “unfolds” when you open it. Note how the vertical edges of the block are no longer vertical. This angle from vertical, which I call the QuaDror angle, will come into play later on.
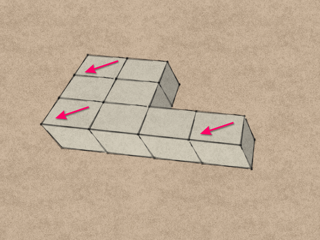
Next, combine eight of the modules into a block. Note the orientation of the shear arrow with respect to the corner of the block; this is critical! We want the shear arrow to be going into the indicated outside corner, not across the corner, as the other two arrows are drawn.
We’ll need four identical blocks to build one QuaDror.
Take two blocks, turn them upside down, and put them together as shown, with the shears pointing inwards towards each other
Take the remaining two blocks and place them on top of the other two. This time, the shears point outwards, but along the same axis as before.
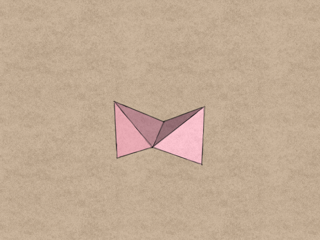
This is the final orientation of the blocks in the QuaDror, but we need to fasten the blocks together in pairs before we can unfold it.
The red and orange blocks are glued face to face on two module faces as shown. (I actually used small pieces of high-strength carpet tape instead of glue, so that I could take my QuaDror apart later.)

And similarly with the green and blue blocks. Of course, the two pairs of blocks have to be glued while they are interlocked, not separated as shown in these last two images!
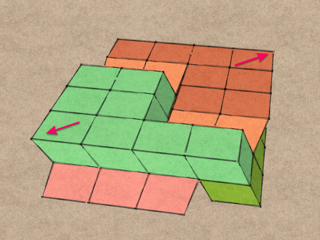
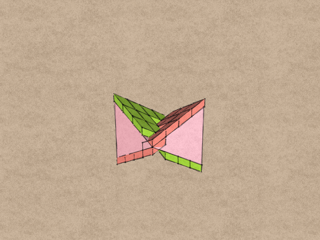
There is an axis of symmetry, perpendicular to the shear direction. This is the hinge axis, and is the axis that the blocks rotate around to unfold the QuaDror.
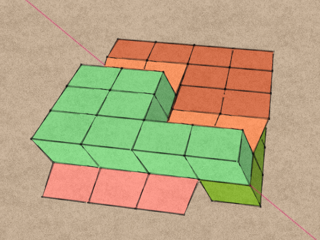
Rotate the two halves in opposite directions around the hinge axis, and the QuaDror is now open and ready to support a surprising amount of weight. Remember the QuaDror angle? That’s the angle that each half must be rotated in order to fully open the QuaDror. A small angle means the QuaDror just opens a little; a large angle means it opens a lot.
Here’s the QuaDror that I built. I used 18mm Baltic Birch plywood; the module is 7/8″ square, and the QuaDror angle is approximately 25°.
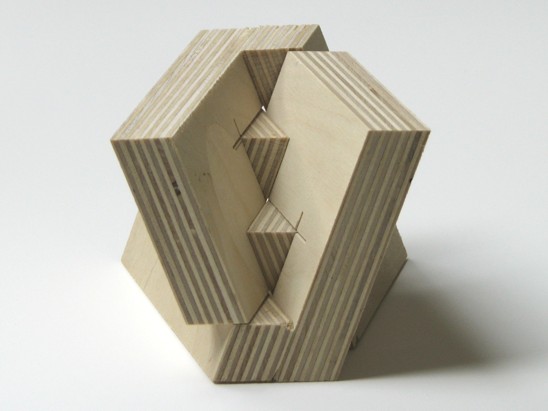
I encountered one tricky bit while cutting out the blocks: The inside (stopped) cuts angle in different directions. If you have a left-tilt table saw, you can cut one but not the other. And if you have a right-tilt table saw, you can cut the second but not the first. I ended up making a small wooden ramp out of some scrap, to hold the block at the correct angle, and used my bandsaw to make the inside cuts (without tilting the table).
Another path to QuaDror enlightenment
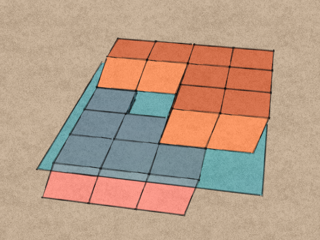
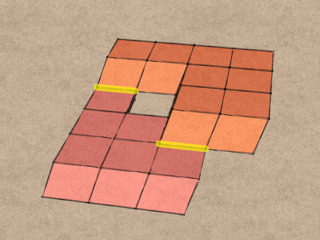
Consider the plane that separates the two blocks in a glued pair. In a QuaDror, there are two such pairs, and therefore two such planes.
When the QuaDror is in the closed position, the two planes are coincident.
When we open the QuaDror, the two planes intersect and interfere with each other.
How can we eliminate that interference?
One way is to alternately remove every other module along the hinge axis, so that both planes stay fairly intact, but they no longer intersect.
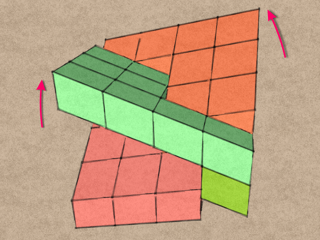
Now extrude the planes into a solid in a direction normal to their original orientation. Lo and behold, we have just produced the QuaDror structure.
Extending the QuaDror concept
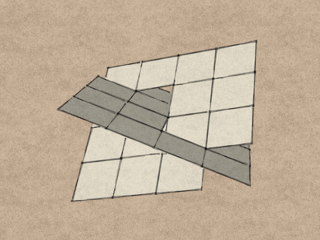
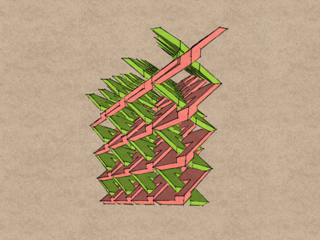
The concept of the QuaDror hinge can be extended to larger numbers of modules. For example:
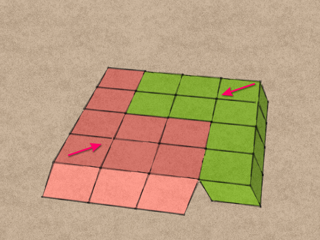
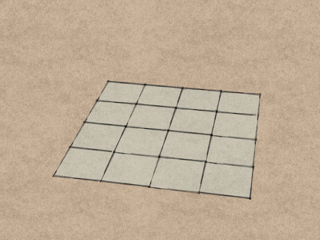
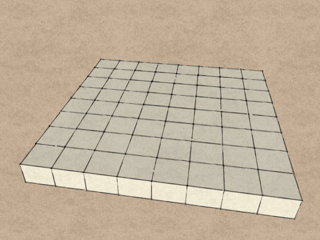
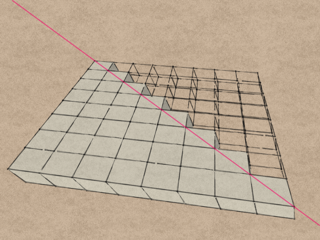
Start by creating an array of modules. It’s simplest if the array is square, with an even number of modules.
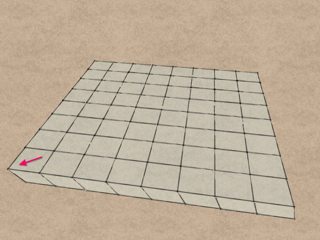
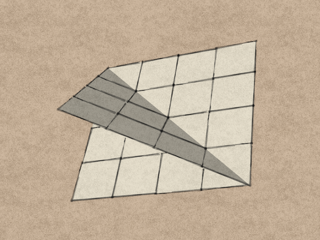
Shear them.
Establish the hinge axis. Remember that the hinge axis is perpendicular to the shear direction.

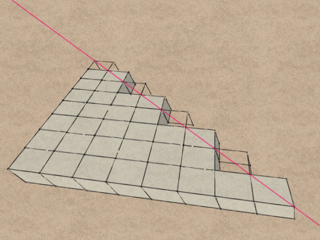
Delete all of the modules on one side of the hinge.
Delete every other module along the hinge.
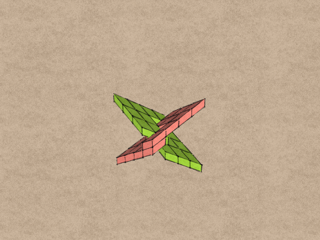
That’s it! You’re done. Now go and build four of these and assemble them together.
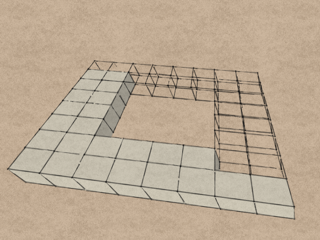
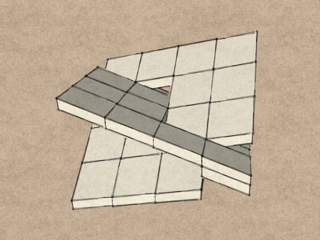
You can also delete more modules to create open frames, etc.
The reincarnation of R. Buckminster Fuller?
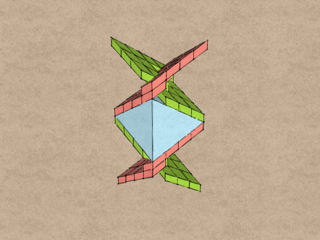
It occurred to me that the shape of the QuaDror when opened is that of two tetrahedra joined along one edge (the hinge). That led to another thought: the space-filling properties of the QuaDror might be analogous to those of Buckminster Fuller’s octet truss. It turned out my hunch was right:
We start with a QuaDror where the faces have been stretched out into 60° rhombi, with a QuaDror angle of 35.26°.
The reason for those particular parameters is that they ensure that the twin tetrahedra are regular (have the same angles at every vertex).
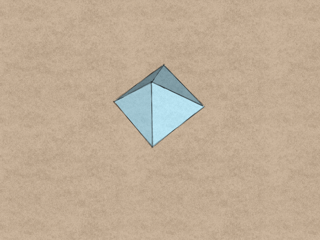
The twin tetrahedra by themselves.
Similarly, the space between two stacked QuaDrors is an octahedron.
The octahedron by itself.
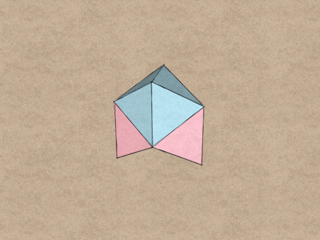
Combining the octahedron and the two tetrahedra, we obtain the unit module of the octet truss.
Of course, it’s not really a “truss” unless we skeletonize the polyhedra.
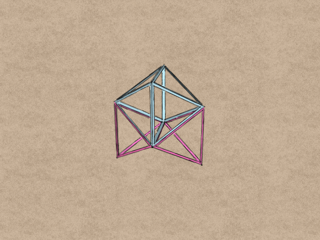
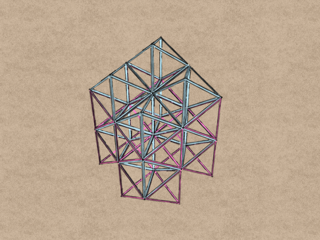
The truss modules stack neatly together in all directions…
…to completely fill space.
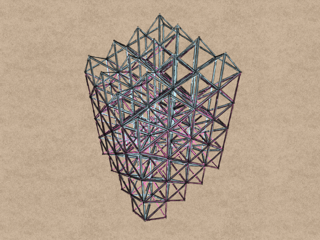
And if the octet truss can fill space, QuaDrors can, too, of course.
Or maybe André Roubo?
While folding the QuaDror back and forth, its similarity to André Roubo’s 18th-century folding bookstand became apparent. The following animation demonstrates the relationship:
And in case you haven’t seen it, here’s Chris Schwarz making a Roubo bookstand from a single board:
If the bookstand can be cut from a single board, so can the QuaDror, although there will be some tricky cuts at the hinge, where you’ll probably have to resort to splitting the pieces apart.
The SketchUp models that I used to create the graphics on this page are available for download: